GitLab and Environment Setup
We will do a lot of programming in this class. Following the instructions here will ensure that you have the right tools to get your work done and to work with your lab and project partners.
Figuring out the tools is an important part of being a good computer scientist. However, figuring out installs and git configurations isn't really what the class should be about. So if you get stuck on any of this, please reach out to a classmate or your instructor for help.
1 About git and gitlab
git is the standard tool that software developers use to work on coding projects together. In this class, you will be working in pairs for most of the labs and for the project, so it makes sense for us to use this tool so you collaborate. As a bonus, you will gain more familiarity with this industry-standard and useful tool.
GitLab is a web service that provides an easy way to host and share git repositories. It has a similar set of functions to github which you may have heard of, but the advantage of being open-source so that we can run our own GitLab server at USNA. For free. Neato!
One of the best features of git is that it frees you from the anxiety of losing your work. The point of using a tool like git is to help track all of the changes in your source code files as you work, and to "merge" together different versions if, say, your lab partner fixes a bug in one part of the code while you're simultaneously forging ahead on another part.
If you use git in a reasonable way, it becomes impossible to lose your work because it's all saved in the repository. However, it can definitely become difficult to sometimes decipher what's happening when things go wrong. So, if in doubt, don't hesitate to ask your instructor for help!
2 Initial setup
2.1 GitLab account
Go to gitlab.usna.edu (intranet only) and:
- Create an account if you don't already have one. If you have one, log in and go to your profile settings.
- Make sure your full name is listed (like how it appears in emails).
- Check the box to share your email address publicly.
2.2 Computer setup
Follow these instructions to set up your environment on a new computer. You only have to one them once on any lab machine (since the filesystem is shared). You will need to go through this again on your laptop (within an Ubuntu VM or WSL command line).
You need to be connected to the USNA intranet before you begin.
- Create an SI413 directory and
cdinto it:roche@ubuntu$mkdir si413roche@ubuntu$cd si413 - Download the SI413 scripts repository from gitlab:
roche@ubuntu$git clone https://gitlab.usna.edu/si413/scripts - Run the setup script and follow the instructions:
roche@ubuntu$scripts/setup.sh
3 Starting a new respository
There are a few main groups of assignments that will each have a separate
git repository (and separate lab partners), stored on GitLab.
The first one you see is called scheme and will cover the first
three labs on Scheme programming.
For each of these, there is a corresponding "starter code" repository that has the (mostly blank) files that you need to fill in with your brilliant code.
When starting each of these groups of assignments on a new computer,
you will use the 413repo command, for example
roche@ubuntu$413repo scheme
Running this command will do a few things:
- Check that the starter code repo actually exists
- See if you already have a repo with this name in your Gitlab, and if so, clone that repository to your computer and finish
- Otherwise, create a new repository and add your instructor as well as any lab/project partners to it.
Note, if you have two lab partners, one of you should first 413repo
and create the new repository, and afterwords when your lab partner runs
413repo they should see this and join up. The whole point is that you
should both be working from the same shared repository on GitLab.
If the 413repo command doesn't work:
- Make sure you are connected to the USNA intranet
- Make sure you have completed the SI413 initial setup on that computer
- If you just ran the setup script, you might have to open a new terminal for everything to take effect.
- Of course, you can always ask your instructor for help.
4 Getting your work done
So now you have a git repository on your computer — so what? The local copy of your git repository is just a folder with some source code files and you can edit them, compile, etc. just like you would any other files.
The difference is, there is a hidden .git directory that includes
extra tracking information, activated when you run an of a large number of git
commands in that folder (or any sub-folder).
There are whole books written on how to use the various git commands, but we will keep it very simple for this class. You probably won't need to worry about branching, tags, rebasing, or any of the (cool but) complicated things like that.
4.1 When you sit down to work
You will want to first git pull to make sure you have the most up-to-date
changes from the starter code and from your lab partner. (Or, from yourself on a different
computer!)
Here are the commands to cd to your repo's directory (here I'm using the
scheme repo that we will start with), then get updates from your instructors
or lab partner. Get used to doing this whenever you sit down to start working.
roche@ubuntu$cd si413/schemeroche@ubuntu$git pull starter mainroche@ubuntu$git pull
If you get an error about "uncommitted changes", that means you forgot to upload your work whenever you stopped working last time! If that happens, start with the instructions in the next section below (namely, do git add and git commit), and then come back here.
If you see an error that says "You have divergent branches and need to specify how to reconcile them", run this command to update your git settings, then try again:
git config --global pull.rebase false4.2 When you've made some progress, or are stepping away
The flip-side of downloading changes from others into your repo before you work, is uploading your own changes so that others can see them (and remember, "others" can include yourself on another computer).
Run these commands to tell git about all your changes ("commit"), and then upload them to GitLab ("push"). The "commit message" should be a few words just basically saying what you worked on. You don't actually have to write anything interesting there, but it can help future-you if something goes wrong and you want to go back to a previous version.
roche@ubuntu$git add .roche@ubuntu$git commit -m "your commit message goes here in the double-quotes"roche@ubuntu$git pullroche@ubuntu$git push
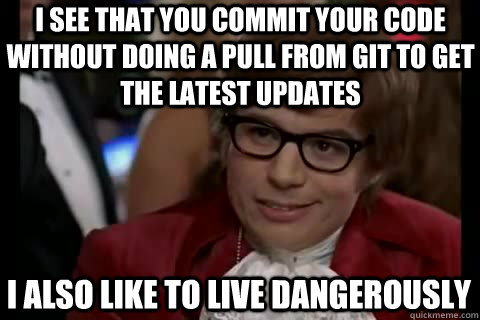
In fact, this incantation is so important that you can get it on a t-shirt. (Wondering why the pull before push? There's a meme for that..)